Thursday, August 4, 2011

Parmesan-herb crusted chicken

Deliciously resourceful


Sorry I haven't been around for a while!  I've finished my research rotation and now I am on a "real" rotation - Radiology.  Last month I didn't have to go in until 9:00 and I left around 2:30 (it was great).  Radiology actually has pretty good hours, but I do have to wake up around 6:00 so I can get in by 7:45 and my sleep schedule is alllll messed up from last month.  I haven't been asleep before midnight all week, so I am pretty tired.  It doesn't make it any better that my rotation calls for sitting in a dark room for hours at a time.  Radiologists are some of the smartest doctors I've met, but boy, this rotation is soooooooo boring!  It feels like time stops when I am at work. It's sorta miserable. 

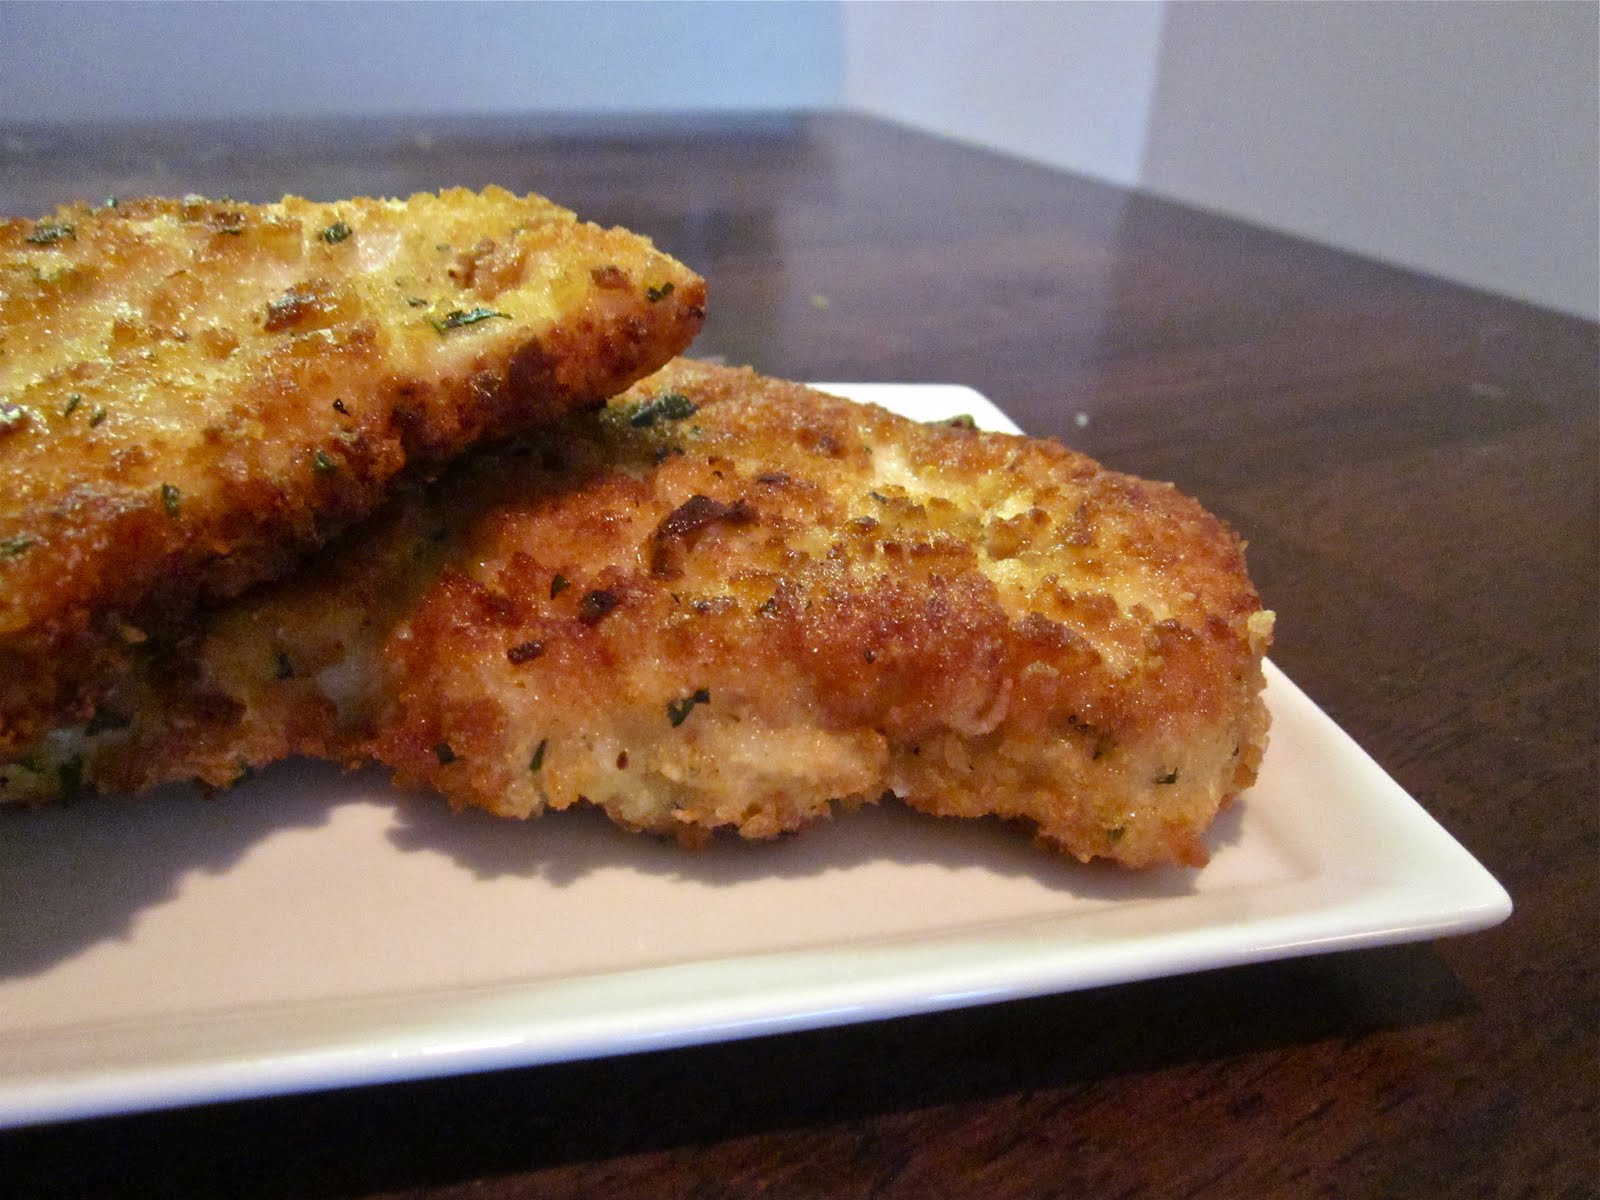
Anyways, I haven't been cooking much this week just because I feel sort of crappy, but I do have this recipe saved up.  I cooked this for Mike last Friday before he left for Indianapolis.  I wanted to cook one of my staples, lemon-herb chicken (which will be posted in the near future!).  But... we didn't have any lemon and it would have been ridiculous for me to run to the grocery store for just one lemon.  So I looked around the kitchen and I saw that I had a block of Parmigiano Reggiano and half of a stale baguette leftover from Bruschetta, which lead me to this recipe!  I was actually looking for breadcrumbs, but Mikey didn't have any so I made them from the baguette - and it was the best idea ever.  It made the chicken so crispy.  Sometimes I think that packaged breadcrumbs can be kind of dense and they can absorb more oil than I would like.  Quick story - over our 3 years together, I have slowly transformed his kitchen from a typical man kitchen (beer, mismatched plates, and a Foreman grill) to a somewhat usable kitchen by bringing a chef's knife and lots of utensils and tools, but I haven't come around to bringing a blender or a food processor. So I was a little ghetto when I made the breadcrumbs because I had to pound them with a meat mallet! You gotta do what you gotta do when you're hungry :)


In addition to making fresh breadcrumbs, I like to grate my own cheese with a Microplane.  The Microplane is one of my favorite kitchen instruments! You should pick one up if you love to cook. It makes a wonderful fluffy cloud of cheese that will keep the coating light.


This recipe is pretty versatile. You could probably use panko breadcrumbs. Or mix up the herbs (I used thyme).  Or even use some other kind of cheese.  I'm all about adjusting recipes depending on what's around the house - we Vietnamese are resourceful!   Anyways, I hope you all enjoy the recipe. 


P.S. This isn't the most healthy recipe (it's pan fried in olive oil) since I wanted to treat Mikey before he left, but you can easily cut down on the fat by baking the chicken.  I guess I would cook at 350-375 degrees for 10-15 minutes, or until the chicken is no longer pink when cut. 


Parmesan-herb crusted chicken
Serves 4

Ingredients
1/4 cup flour
2 eggs
1 tablespoon fresh thyme, finely chopped
1 tablespoon fresh rosemary, finely chopped
1 cup fresh breadcrumbs*
2 tablespoons garlic, minced
1 cup grated Parmigiano Reggiano cheese
4 skinless, boneless chicken breast halves, pounded 1/4-inch thick
4 tablespoons olive oil
Salt and freshly ground black pepper

Directions:
 1. Season chicken cutlets with salt and freshly ground black pepper.  Use about half of the salt that you would usually use, since you will be coating with Parmigiano Reggiano later.
 2. Gather 3 shallow dishes.  In the first dish, place the flour.  In the second dish, beat 2 eggs. In the third dish, combine the thyme, rosemary, breadcrumbs, garlic, and cheese.
 3. Heat 2 tablespoons of olive oil on medium-high heat.  While oil is heating up, coat chicken - first in flour, then in egg, finally in breadcrumb-herb-cheese mixture.  Between each step, make sure you shake the cutlets off so they are not over-coated.
 4. Cook the cutlets, two at a time, for about 3-4 minutes per side (or until golden brown).  Repeat with the remaining olive oil and cutlets. 

*Fresh breadcrumbs can be replaced by dried breadcrumbs, but they can be dense. Here's an easy way to make fresh breadcrumbs that only takes 10 minutes!  Take about a quarter of a day old baguette and slice into very thin (1/4 inch or less if you can) slices.  Place in a 250 degree oven for 10 minutes, or until the slices are crisp all the way though. Try not to brown them too much. The thinner you slice the baguette, the faster it will crisp.  Cool for a minute or so and then pulse in a food processor.  Voila! Fresh breadcrumbs :)


Here's the entire meal we had that night. I'll post the rest of the recipes soon.  Sorry the pictures aren't great but we were hungry and it smelled so good so I took the pictures in a hurry.   Goodbye for now, loves!

xoxo <3
Nhu-Y

Monday, August 1, 2011

Lemon-pepper tilapia

You'll never use the powdered stuff again!


Photo courtesy of Jenny's camera phone
This post is dedicated to my dear cousin and wonderful roommate, Jenny Luu.  We haven't spent any time with each other for a while, so today we shopped for 5 hours!  It's amazing how much damage we can do at the mall :). We (sort of) behaved ourselves today though. I got a pair of boots for the fall, a shirt (for $7!), and an obi belt that I have been eyeing for months :) After such a shopping trip, we didn't want to spend any more money on eating out, so we decided that we would cook a cheap and healthy meal for dinner.  We were also having some girls over, and really, we didn't want to pay for restaurant food either!  Plus, since Jenny is moving out in a month, I have to teach her some recipes so she doesn't starve when I'm not around (Love you Jenny!)


Since we wanted something healthy and cheap, we chose tilapia.  Salt and pepper was easy but boring, and we are not boring girls!  Actually, we had lemon-pepper tilapia once before - Jenny made me lemon pepper fish once with some powdered lemon pepper ... and it was the most horrible thing I had ever tasted!  It tasted like chemicals - like a combination of the stuff they put on sour patch kids to make them sour plus cheap black pepper - ick.  So I came up with this recipe for her because it is super easy and it only takes 20 minutes to make.  The lemon zest gives the fish lots of great lemon flavor without being tart.  Jenny, I hope you took notes!


Lemon pepper tilapia
Serves 4
Print this recipe


Ingredients
4 tilapia fillets
1 lemon, zested and thinly sliced
1 teaspoon fresh thyme, finely chopped
1 large or 2 small cloves of garlic, minced
2 teaspoons extra virgin olive oil
salt and freshly ground black pepper


Directions
1. Preheat oven to 375 degrees F. 
2. Combine lemon zest, thyme, and garlic in a small bowl.
3. Season both sides of tilapia with salt and pepper.
4. Lay lemon slices in a single layer on a piece of parchment paper (on a baking sheet), then lay the tilapia fillets on top of the lemon slices. 
5. Top each fillet with the zest-garlic-thyme mixture and rub it in. 
6. Drizzle with olive oil.
7. Bake for 15 minutes or until fish is opaque and flakey. 
8. Enjoy without guilt! 


Crap, it's past 11:00 and I told myself that I would be in bed by 10:00 for work tomorrow.  Please excuse any spelling errors, I wrote this super fast as I was chatting with the ladies!


xoxo <3
Nhu-Y

Sunday, July 31, 2011

Betty's


Hope everyone is having a happy Sunday, because I sure ain't.  Still feeling sick from a few days ago, and now I feel like vomiting my brains out  >_<.  I finally came back to my apartment and I had some grand plans to clean, do laundry, cook, etc, but all I did today was cuddle on the couch with my pup.  Mike left for Indianapolis today and I'm sadder than I thought I would be :(  Gotta be strong though. We're only going to be apart for a few months though, I can handle it!  Hopefully I will have more time to hang out with my roomie; we haven't been at our apartment together for more than 2 days at a time for quite some time!  

Ok, enough ranting, let's talk food!


Last night, Mikey and I went to the Short North district for a date night.  I looove the Short North - it's a little gem within Columbus, with art galleries, vintage shopping, and lots of great non-chain restaurants.  We did a little shopping before we ate to build up our appetites and I found a cute vintage yellow purse for only $19!  The strap is a little short, but for less than 20 bucks, I couldn't pass it up.


Oops, still haven't mentioned the food yet!  So I know in my last post, I said that we were going to try something new, but we ended up going to one of our favorites, Betty's.  It's a really tiny restaurant with no more than 15 tables smooshed into a long and narrow space and you usually have to wait for 40 minutes, but definitely worth it.  Betty's is super kitschy with pin-up girls covering the walls and crazy ceramic cats on the bar - by no means a "sophisticated" place - but it's really fun.  


For our drinks, Mike ordered a beer called Abita Purple Haze.  It was a wheat beer that had raspberry puree added after filtration.  Mike didn't like it much and said that it tasted watery.  I ordered the Mini Van - rose wine, sugar saturated raspberries, and soda.  Sweet and I could barely taste the alcohol, I loved it! (I'm a light-weight - it's an Asian thing.)


We ordered fried plantains served with a zesty yogurt sauce for an appetizer.  When it came out, I was less than impressed with the plating.  There were 5 or 6 pieces of plantains on a giant plate.  I thought that they would be immature and taste like potatoes, but they were nice and sweet like bananas. They weren't too greasy and tasted pretty good.  But I don't think I will be ordering it again because it was $8 for a teeny portion.


For our entrees, we ordered mac and cheese and meatloaf.  Both were wonderful.  We already knew that the mac and cheese was good (it was the reason we went to Betty's in the first place).  Their mac and cheese isn't the run of the mill mac and cheese! It has poblano peppers, sweet corn, and red onions.  OMG, so good.  And the cheese! The cheese is sooo creamy.  They must use evaporated milk or some sort of processed cheese, but I don't even care :).  The meatloaf was a recommendation from one of the docs that I worked with last year.  It was a good choice - Thanks Dr. Wexler!  Very moist and a hint of sweet from the bell peppers and it was even better with the ketchup sauce. Not much else to say about that, I mean how many words do you need to describe meatloaf?


Overall, we love Betty's.  It's not fancy, but it's good food and a fun environment.  Plus, there's a Jeni's like 2 blocks away.  No pictures of that unfortunately.. we started eating before we even paid!  But here's a picture of a crazy ass ride that we took while we were waiting in line for Jeni's - it's called the Cycle Tavern.  A pedal-powered bar-hopping tour.  I really can't describe it because I've never seen anything like it before, so take a look at their website. 


Whoa, this post is way longer than I thought it would be.  I'm starting my radiology rotation tomorrow, so I'll be back in a few days.  Talk to you then!


xoxo <3
Nhu-Y

Saturday, July 30, 2011

One more day..

Mikey's staying one more day!  He won't leave for Indianapolis until tomorrow... so no food post today :) I've gotta spend some QT with my sunshine. We are going to the Short North district for some quirky eats and some vintage shopping.  I'm so excited!  We're trying a new place tonight, so I may write a "review" on our meal later.


Until next time!


xoxo <3
Nhu-Y

Friday, July 29, 2011

Bruschetta


Leftover tomatoes and basil? No problem!


 TGIF. I've been feeling pretty blah for the past couple of days, but it feels nice to relax now. I had to leave work early today because I was feeling so nauseous :/ I think I have a serious case of GERD. I have been having a dry cough for a few months and I just feel queasy. Guess that doesn't mean much unless you're a med school geek like me, but believe me, it's no fun. 


I left work around 2:30 and I was hoping that I would feel a little better after the drive home so I could get some stuff done.  But.. still feeling poopy. I really wanted to go to the mall and get these super cute riding boots that I can wear this fall, and I was going to stop off at the grocery store to buy some food to cook for Mikey tonight.  It's gonna be our last meal together for a while!  He's going to Indianapolis (about 3 hours away) for a urology rotation and he's leaving tomorrow.  I'm really sad because he and I are basically inseparable.  I stay at his place for weeks, sometimes months at a time and now we won't really see each other for 3 months (he's going to Chicago after Indianapolis and then I'm going to Dayton for a rotation).  Boo. Guess it's just a taste of what residency will be like. Gotta prepare myself! 


Anyways, since this is a food blog, let's talk about something yummy!


A few days ago I made a caprese salad so I have a bunch of basil and a few vine-ripened tomatoes leftover.  Not wanting any of it to go to waste, I decided to make one of my favorite appetizers - tomato and basil bruschetta. Bru-SKetta, or bru-SHetta, however you pronounce it, is actually the bread - the word bruschetta is derived from the word "bruscare", which means to roast over coals. We Americans have butchered both the pronunciation and the actual definition of the word! Anyhow, I'm just going to call my recipe tomato and basil bruschetta because I am American I don't really know what else to call it.  


As with the caprese salad, I prefer my tomato and basil bruschetta topping to consist of nice, fresh ingredients.  No canned tomatoes, no dried basil, and no jarred garlic.  Please.  I kind of threw this recipe together with the ingredients that I had on hand, so feel free to modify to your liking.  This recipe is a little heavy on the garlic, just to warn you.  I have also done this recipe with a couple of teaspoons of balsamic vinegar stirred in and it is equally as delicious.  You can also top your bruschetta with a little fresh mozzarella cheese and have a little caprese salad on toast!  Well I hope you enjoy this recipe.  It takes about 10 minutes to make, and most of that time is spent chopping. 


Oh by the way, the Kroger by Mike's apartment had chunks of Parmigiano Reggiano on sale for $3/lb! Not the "parmesan" cheese from Wisconsin or whatever, but the actual stuff from Italy (it was stamped on the rind). No offense to Wisconsin cheese - I loooove cheese and will eat almost any kind of cheese from Wisconsin any day, but I think that real Parmigiano Reggiano just has a unique flavor that cannot be replicated.  I think it was so cheap because they were corner pieces with a lot of rind, but you can just use the rind in a soup or stock.  Or you can give it to your dog! Just kidding, don't give it to your dog - he might choke and I couldn't live with that. I think that my dog would just poop it out whole.  Haha, well enjoy the recipe!


Bruschetta (adapted from foodnetwork.com)
Print this recipe

Ingredients
1 narrow Italian or French loaf of bread
1 head garlic, cut in 1/2 crosswise
2 tablespoons extra-virgin olive oil
Kosher salt and pepper
¼ freshly grated Parmesan cheese

Directions
1. Preheat oven on broiler setting. Place a rack approximately 6 inches from broiler.
2. Slice the loaf of bread, on the bias, into 3/4-inch slices. Place bread in oven on sheet pan and broil, approximately 1 minute on each side.
3. Remove to a platter and rub each slice of bread with the garlic and then brush with olive oil. Sprinkle with freshly grated Parmesan cheese and return to oven for 1 minute, or until cheese is melted. (watch carefully so it doesn't burn!)
4. Sprinkle with salt and pepper and serve immediately.


Tomato and Basil Bruschetta
Print this recipe

Ingredients

3 firm vine-ripened tomatoes, diced (about 2 cups)
1 1/2 tablespoons garlic, minced
2 tablespoons fresh basil, finely chopped
1 - 2 tablespoons olive oil
salt and freshly ground black pepper
Parmesan cheese, grated 

Directions
1. In a medium sized bowl, combine tomatoes, garlic, basil, and olive oil. Add salt and freshly ground black pepper to taste.  Allow to sit for 10 minutes for flavors to marry.  Top with freshly grated Parmesan cheese if desired. 


I don't know if I'll be back to post for a few days. I am helping Mikey move tomorrow and then going back to my apartment to clean, clean, clean!  It is a crazy mess at my apartment because I have only been back to drop off dirty clothes and pick up clean ones this past month. Oh well. Have a great weekend, everyone!


xoxo <3
Nhu-Y 


Wednesday, July 27, 2011

Caprese salad

Simple summer salad


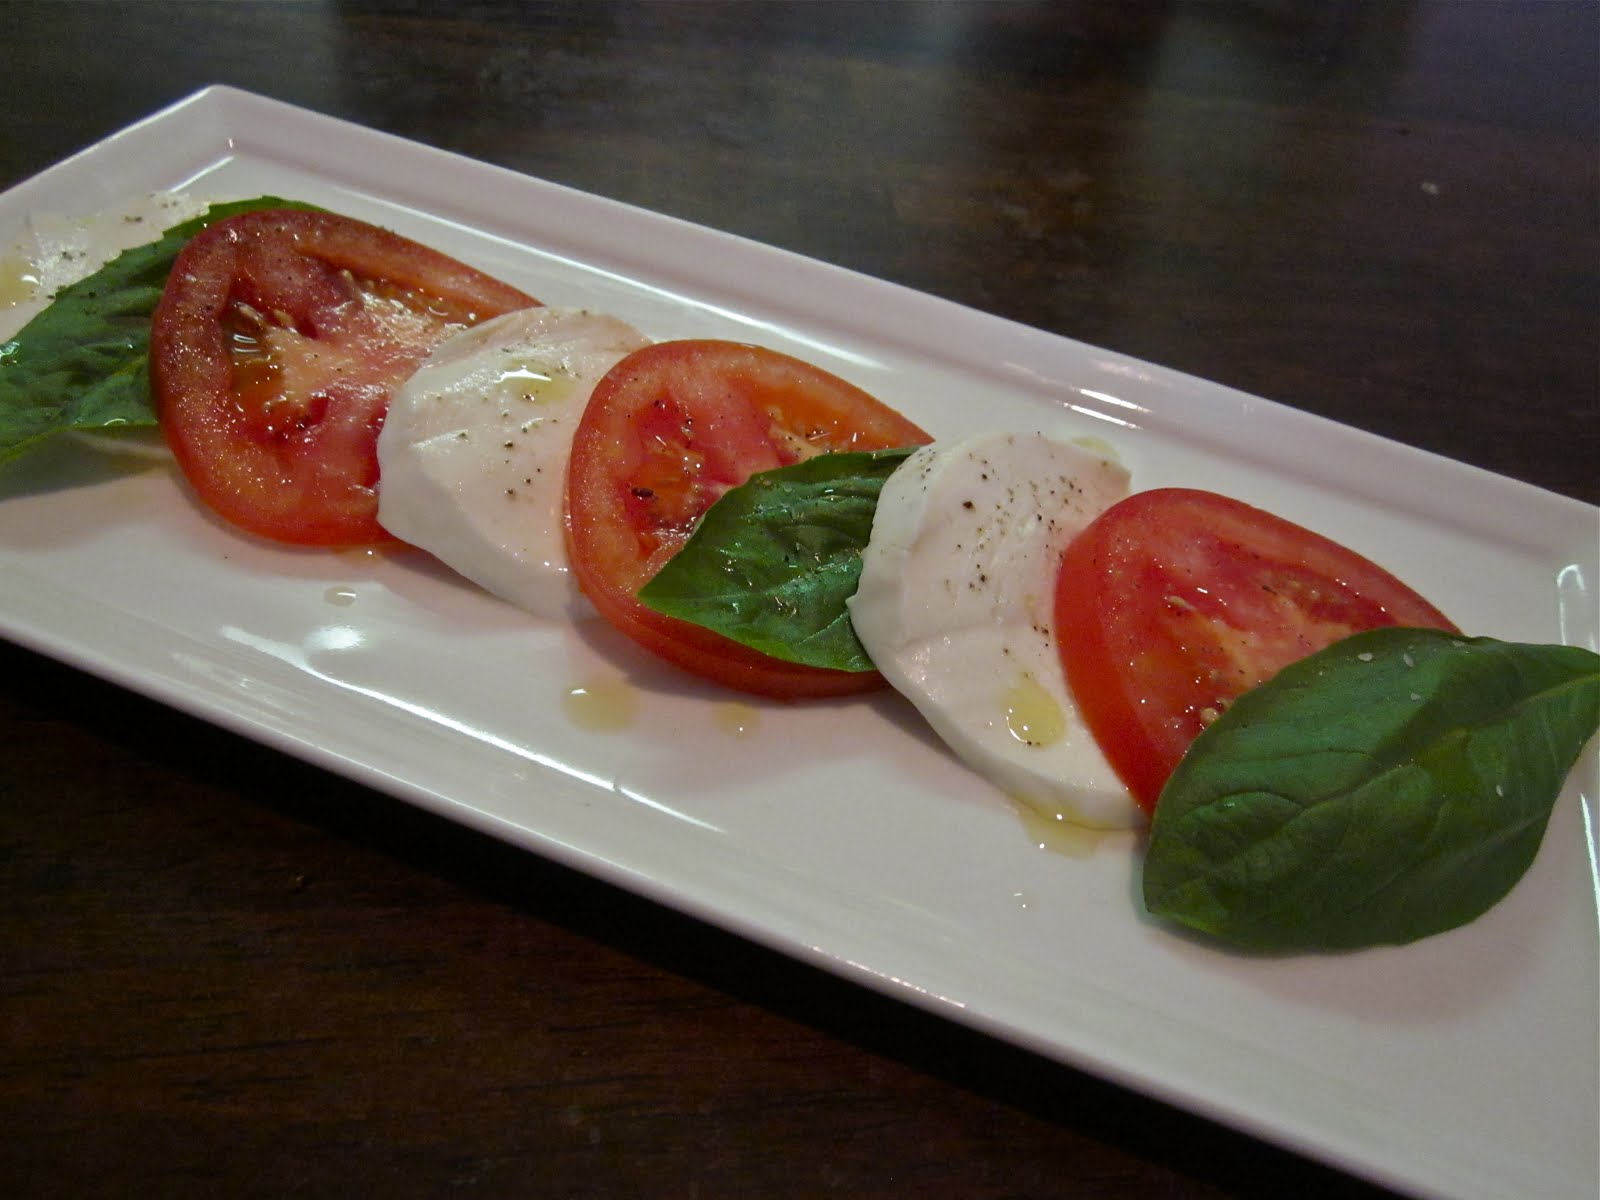
 A lot of the women that I have worked with this month have gardens.  Every day at lunch, they bring cucumbers, tomatoes, bell peppers, and other beautiful and colorful vegetables.  Yesterday, one of the ladies was mentioned her basil and tomatoes, so of course caprese salad came to mind.  I thought that it would be a wonderful and light salad, and it was!

Caprese salad is a simple salad from the Italian region of Campania.  It is classically made of fresh sliced mozzarella cheese, tomatoes, and basil seasoned with salt, pepper and olive oil. I’ve seen variations with balsamic vinegar, with marinated cheese, with roasted tomatoes, and even on a stick! But I think the best way to have it is the classic way – it’s the way that the Italians do it, and they know best. 


Because this is such a simple recipe with few ingredients, it is important to get the best ingredients that you can.  I read a review for this recipe and the lady used jack cheese and canned tomatoes – what a crime! (AND she had the nerve to give the recipe 3 stars!)  A farmers market is perfect for this, but even if you don’t have time to go to the farmers market, just make sure you get fresh heirloom or vine-ripened tomatoes, fresh (NOT dried) basil, and fresh mozzarella.  Most supermarkets now have a great cheese selection and some even have antipasti bars where you can get fresh mozzarella. A nice sweet extra-virgin olive oil is good too, but not absolutely necessary.  I have found that Trader Joe’s has a great inexpensive olive oil from California.  I can’t recall the exact name of the oil, but it comes in a tall, dark, cylindrical bottle. 

I just threw this together and didn’t really use a recipe, but I found a Rachael Ray recipe that is similar to what I did.  One thing that I like to do a little differently is season the tomatoes before I layer the salad.  The salt makes the tomatoes a little more tomato-y, if that makes any sense :). Also, I actually like to tear the basil because it makes it easier to eat. I left them whole in the pictures because it was so pretty. I hope you enjoy!

Caprese Salad (courtesy of Rachael Ray)
Serves 4
Print this recipe


Ingredients
3 vine-ripe tomatoes, 1/4-inch thick slices
1 pound fresh mozzarella, 1/4-inch thick slices
20 to 30 leaves (about 1 bunch) fresh basil
Extra-virgin olive oil, for drizzling
Coarse salt and pepper

Directions
Layer alternating slices of tomatoes and mozzarella, adding a basil leaf between each, on a large, shallow platter. Drizzle the salad with extra-virgin olive oil and season with salt and pepper, to taste.

Bon appetit!


Tuesday, July 26, 2011

Roasted Garlic Risotto


Simple Luxury


A few days ago, I wrote a post about roasted garlic and the many different ways you can use it.  Today, I will prove it and use roasted garlic in a recipe! 

When I think of risotto, I think that it belongs with a very fancy meal that takes all day to make.  But the truth is, risotto is very easy to make.  It is a bit time intensive, but as long as you are able to stir, you can make risotto :).   The secret is continuously stirring the risotto as you add the liquid.  It helps the starch come out of the rice, making it very, very creamy with no fattening heavy cream at all!  This particular recipe uses water as the liquid, but traditional risottos use a beef or chicken broth.  Since water is essentially flavoring the rice from the inside, I would use filtered water.  I have also made this recipe with ¾ water and ¼ chicken stock, and it did not overwhelm the garlic.

If you start roasting the garlic first, and then prepare the risotto while the garlic is roasting, it only takes about 40 minutes to make the entire recipe since the garlic is stirred in at the last minute.  I don’t even puree the garlic – I just mash it up with a fork and it saves a few minutes (and a few dirty dishes). This is a great recipe because once you learn the technique you can make any kind of risotto you’d like!

Roasted Garlic Risotto (Adapted from the Bon Appetit Cookbook)
4-6 servings

Ingredients
1-2 heads of garlic, roasted & pureed (depending on how much you like roasted garlic!)
4 cups of water (do not use stock, it will overwhelm the taste of the garlic)
2 tablespoons butter
1/4 cup finely chopped onion
1 cup arborio rice
1/2 cup dry white wine
1/4 cup freshly grated Parmesan cheese
2 tablespoons chopped fresh parsley
salt & freshly ground black pepper

Directions
1. Bring 4 cups water to a simmer in a medium saucepan. Reduce heat to low, cover, and keep hot.
2. Melt butter in heavy large saucepan over medium-high heat. Add onion and saute until tender, about 3 minutes.
3. Add rice and stir until golden, about 3 minutes (toasting the rice helps prevent it from becoming soggy).
4. Add wine and stir until absorbed, about 2 minutes. Ladle in 1/2 cup hot water (or as much as your ladle will hold). Reduce heat to simmer and stir until liquid is absorbed. Continue adding hot water one ladle at a time, simmering until liquid is absorbed before each addition and stirring frequently, until rice is just tender and mixture is very thick, about 25 minutes. *Tip - the more you stir, the creamier your risotto will be.
5. Add in cheese, parsley, and garlic puree into risotto. Season to taste with salt and freshly ground black pepper. Remember that the Parmesan cheese is salty, so be sure to taste before you add salt. Top with additional Parmesan cheese and parsley and dig in!

I hope you enjoy this dish as much as Mike and I did :). Bon appetit!