Showing posts with label international. Show all posts

Saturday, November 12, 2011

Vietnamese pork chops

Chicago


Guys, I have a confession.  I have a love affair with Chicago (don't tell Mikey).  I've been to Chicago a bunch in the past, but the last time I was there, I could actually picture myself living in the city.

Friday, November 4, 2011

Spam musubi

Spamalot


So... how do you like the new look?  I spent half a day with my little brother trying to clean up my blog a bit (thanks Mickey!). I'm still working on it, so if you have any suggestions, please let me know!  Or, if you know how to work a blog, please come help me!  If my little brother wasn't around, you wouldn't be reading this today.  Note to blog newbies - don't try to edit the code! 

Saturday, October 29, 2011

Bun Bo Hue (Beef and lemongrass noodle soup)

Hallo-weenie


Hello my friends!!!  Oh how I've missed you.  I sincerely apologize for being a bit of a weenie lately, last month was a real "b" (I'm sure you can guess what that letter b stands for). To make a long story short, the month in Dayton was not exactly relaxing, and I had no time to do any of the things that I planned on doing (blog, cook, sew, make jewelry, etc).  Nope, it was never ending work.  And the worst part was all of the crap that I had to see.  Literally.  I worked with a gastroenterologist.  I can handle gross stuff - I want to touch people's eyes for a living - but last month was just icky.

Tuesday, October 4, 2011

Cha trung hap (Vietnamese steamed egg with pork)

Leftover remix #2


Welcome to my second installation of recipe remixes.

Sunday, October 2, 2011

Cha gio (Vietnamese egg rolls)

Ayo Technology


It would be more apt to title this post "lack of technology" (but I really like that song, and this is my blog, and I can name it whatever I want!).  I am back at my mom's for a month for a rotation, and I didn't have my computer, cable TV, or my iPod.  But guess what?  I survived.  But since I didn't have my computer, I couldn't post.  But now I'm back and ready to cook my heart out!  Here's the post that I promised last week - Vietnamese egg rolls.  

Saturday, September 24, 2011

Bun thit nuong (Vietnamese grilled pork with noodles)

Welcome back


Here comes the recipe you've all been waiting for!  Mikey finally came back from Chicago, so I cooked his favorite Vietnamese dish.  A Vietnamese meal from his Vietnamese girlfriend :). Suffice it to say, Mikey enjoyed his welcome back meal.  The way to a man's heart really is through his stomach.

Friday, September 23, 2011

Canh rau muong (spinach soup)

Autumn


Happy Friday!!  It's the first day of fall, I finished my anesthesia test in 10 minutes, and Mikey is coming back from Chicago today!  It's gonna be a good day.  Remember, I'm cooking Mikey a special meal for tonight and I have been prepping for a few hours.  

Tuesday, September 20, 2011

Fried rice

Leftover remake #1


Good evening, my lovelies.  Remember when I said that I would spice this blog up by having themes and challenges?  Well, here's theme number one.  Every two weeks, I will post a recipe remaking leftovers.  I constantly have leftovers, and sometimes it is fun to change it into something else.  It's like I'm tricking myself into eating something new.  Yes, I am like a child and I need to trick myself into eating food.

Monday, September 19, 2011

Banh xeo (Vietnamese crepes)

Moving


It's been a crazy busy two weeks, but I'm finally back.  I've missed you guys! In the past two weeks, I moved, completely unpacked, intubated several patients, visited my momma, and visited Mikey in Chicago (pictures to come!).  It was the most stressful move EVER.  I won't go into details, but let's just say there were so many trips to and from my third floor apartment that my legs felt like jelly by the end of the two days it took me to move.  And the next day, I felt like I had run a marathon.  Did I tell you that I HATE MOVING?  This is the eighth time I've moved in eight years.  And I have to move in 10 months when I graduate. Boo. Note to self: hire movers next time. Or buy an elevator. Or make friends with some big burly men (but Mikey probably wouldn't like that :))

Wednesday, August 24, 2011

Ghetto lo mein

If ramen is wrong, then I don't want to be right


I know what you're thinking - "Ghetto lo mein?  What the H does that mean?  Is it from the hood?  Is Nhu-Y from the hood?"


Well let me answer those questions for you, my friends.  Ghetto lo mein is a concoction dreamt up by my kitchen-illiterate cuz.  I love her dearly, but she's no Julia Child.  So it is not from the hood, it's from a little asian girl from the 'burbs.  And no, I'm not from the hood either, but I lived pretty close to some not-so-reputable places when I was a kid (one time, I even wore my hair in cornrows - and that's hood).


Let me preface this recipe by saying that it is not lo mein. It's just what my cousin calls this dish.  In no way does this resemble lo mein, with the exception that it is composed of noodles and grease.  So if you are looking for something that you can get from your favorite Chinese restaurant, check back later.  But if you are looking for cheap eats, read on.  


Now, don't judge.  I know ramen is the fare of a college freshman.  But hey, I am a medical student in lotsa debt.  I can't always afford to eat foie gras, truffles and gold.  Besides, I haven't cooked in about a week, and I feel guilty not posting something that I didn't cook.  That's how much I like you guys - I feel guilty when I eat things like burgers, ice cream, and deep fried Snickers bars that I can't share with you :)


When my cousin makes this dish, it consists only of ground beef, ramen noodles, and ramen seasoning.  Yes, only 3 ingredients. Really, only 2 ingredients because the noodles and the seasoning come together. But surprisingly, it tastes good.  Maybe it's the pound of grease they pack into each tiny bag of ramen noodles.  Or maybe I can taste the memories from my good ol' college days, I'm not sure.  I did decide that this recipe was a little too ghetto for me, so I added some greenage in the form of scallions and broccoli. 


Try it, you'll like it.  And if you don't, you've spent a dollar - you probably have more money lost in your couch. 


Ghetto Lo Mein
Serves 4
Print this recipe


Ingredients
4 packages of beef flavored ramen noodles
1 pound of ground beef
1 tablespoon oil (optional)
If you want it fancy, add:
2 scallions, cut on the bias
1 large head of broccoli, cut into florets


Directions
1. Boil 2-3 quarts of water.
2. While waiting for the water to boil, brown the beef in the oil on medium-high heat (if you use a nonstick pan, some nonstick spray should do).  Break the beef up as well as you can. Drain the beef once it is cooked through.
3. Stir one package of the ramen seasoning into the beef and add the whites of the scallions.  Cook for an additional minute or two. Reduce heat to medium-low.
4. Once water boils, cook the broccoli for 3-5 minutes, depending on how crisp you like your broccoli.  Remove the broccoli from the water with tongs or a slotted spoon and add to the meat (leave water in the pot for the noodles).
5. Bring the water back up to a boil and cook noodles for 4 minutes (or 1 minute less than the directions on the package).  When noodles are cooked, drain and add to the beef and broccoli mixture.  Turn heat back up to medium-high and stir in 1.5 - 2 packages of ramen seasoning to taste.
6. Top with the greens of the scallions. 
7. Eat with a your hat cocked to the side, an oversize white tee, and some gold teeth.  


I promise a sophisticated recipe next time. Until then -- 


Peace out homies. 


xoxo <3
Nhu-Y
Me and my lovely cousin


Wednesday, August 17, 2011

Fettuccine Alfredo

Let's spice it up!!!


Good morning! I have the morning off so I decided to get a quick post in :)  I spoke to a friend from college a few days ago, who has a great food blog of her own.  She has tons of great recipes and I asked her where she finds the time to cook so often.  And what she said -- when cooking is a hobby you enjoy, it's not work -- really made me think about this blog.  I don't want it to turn into work. I love cooking so much and I want you all to know how much I love it!  I delayed the start of this blog because I was so busy with school. But medical school is not an excuse anymore!  I'm telling you now - I will make the time to cook most of the week, and I will try a new recipe at least twice a week.  Accountability!  And I'll cook even more when Mikey gets back in town, because it's way better to cook for two :)


I've also been thinking about ways to spice up this blog.  Here are some ideas: Posting weekly menus (planning makes cooking so much easier!), weekly themes, and some sort of challenge.  I read a lot of fashion blogs and I often read about "remix challenges", "color challenges", and even "no-repeat challenges".  I think that I can translate those challenges to food.. eek, I'm so excited now!  More details to come.. 


Ok, here's a quickie recipe for you all.  Fettuccine alfredo.  It's not the typical Americanized fettuccine that you have in the restaurant with thick and goopy (is that a word?) sauce.  Folks, this is the real deal. It's how fettuccine alfredo started in Italy.  That's right, Italy, not America. Here's a really interesting post on the original fettuccine alfredo. The ingredients are simple: pasta, butter, cheese.  What could be bad about pasta, butter and cheese?  Oh right, the fact that it's pasta, butter, and cheese :) But who cares?  We all need to indulge every so often. This isn't as heavy as restaurant fettuccine, but it is definitely rich - and absolutely delicious. 


I've said this before, and I will say it again because it is of utmost importance - since this recipe is so simple, it is important to use quality ingredients.  Parmigiano Reggiano, real butter, freshly ground black pepper.  You can use fresh or dry pasta, but I think that fresh pasta holds on to the sauce better. This recipe does have an option to add cream - for those of you who can't quite say goodbye to cream :). Bon appetit!


Fettuccine Alfredo (adapted from Simply Recipes)

Ingredients
1/2 pound fettuccine noodles
3-4 Tbsp unsalted butter
2/3 cup finely grated parmesan cheese
Black pepper
Additional, for creamy version:
1/2 cup cream
Nutmeg

Directions
1. Bring a large pot of salty water to a boil and drop in your fettuccine.
2a. Plain version Melt the butter in a large sauté pan set over low heat. Once the butter has melted, turn the heat off.
2b. Creamy version Melt the butter in a large sauté pan set over low heat. Add the cream to the butter as it melts. Stir often to combine the two, do not turn off the heat, but keep the heat at its lowest setting while the pasta cooks.
3. When the fettuccine is al dente (cooked, but still a little firm) lift it out of the pot with tongs and move the pasta to the sauté pan. Do not drain the pasta. You want it dripping wet with the cooking water. Turn on the heat under the sauté pan to medium and swirl the pasta and butter together to combine. Add half the cheese, then swirl and toss the pasta until it has incorporated into the sauce. If needed, add a few spoonfuls more of the pasta cooking water. Add the rest of the cheese and repeat.
4. Serve at once with either a little black pepper (for classic version) or nutmeg (for creamy version) ground over the pasta.

I ate this as a side dish, but if you add some meat and veggies, it would be a (very filling) entree. 

That is all.

xoxo <3
Nhu-Y


Monday, August 15, 2011

Ginger-Soy Salmon

Atlantic goodness


Hello everyone!  Hope that you had a wonderful weekend.  Last night my roommate and I went out to eat for her last night in Ohio (she flew to Florida for a week this morning) and we had chicken wings, pizza, and french fries.  And I didn't regret it one bit.  It feels nice to pig out every so often :)  But since I ate out yesterday, I decided that I HAD to cook tonight.  I only cooked one of the three recipes that I proposed last week, so I will be cooking the rest them this week.


I started with the salmon recipe because I have been craving it all week.  I try to eat fish once a week but I had so much lasagna from last week, I didn't eat much else.  This recipe is a conglomeration of at least 3 recipes - Mike's dad makes a great salmon with soy sauce, olive oil, and scallions; my parents make a marinade with soy sauce, limes, and sugar; and I've had dishes that combine soy and ginger at many restaurants. 


I loooove this recipe.  I think that it tastes complex enough to come from a restaurant, but it is still very comforting.  It's not heavy, and if paired with brown rice and a veggie, it's a very balanced meal. It's a home run.


Even though there are a lot of ingredients, it only takes a few minutes to throw the marinade together, and 5 minutes or so to crisp the skin.  The rest of the time is spent on letting the fish marinate and on baking the fish.  I hope you enjoy this as much as I do.. I had a hard time keeping myself from eating two servings (I promise, I saved some for tomorrow).


P.S. You can skip crisping the skin in the frying pan, but I recommend that you try it at least once.  It is well worth the extra 5 minutes.  You'll thank me once you try it.  Promise.


Ginger-Soy Salmon
Serves 4
Print this recipe


Ingredients
4 6-oz pieces of skin-on salmon
1/2 cup soy sauce
2 tablespoons sugar
2 tablespoons olive oil
4 tablespoons water 
6 cloves of garlic
1-inch section ginger
Juice of 1 lime
2 scallions
finely ground black pepper
2 tablespoons olive oil
a few drops of dark sesame oil
cilantro, to garnish
toasted black and white sesame seeds, to garnish


Directions
1. To make the marinade: In a dish large enough to place the salmon in a single layer, combine soy sauce, sugar, olive oil, lime juice, water, and black pepper. Grate in garlic and ginger. Finely slice the scallions and add the whites to the marinade (reserve the greens to garnish). At this point, taste the marinade and adjust seasonings.  Set aside 1/3 cup of marinade for later. 
2. Place salmon into marinade and turn to coat both sides. Marinate for at least 1 hour, flesh side down. 
3. Preheat oven to 375 degrees F.  While the oven is preheating, heat 2 tablespoons of olive oil on high heat in a stainless steel frying pan.  
4. Remove fish from marinade and dry the skin with a paper towel.  When the oil is hot, place the salmon skin side down into the pan.  Press the fish down with a spatula to ensure that the skin has good contact with the pan.  Cook for 3-4 minutes or until the skin becomes crispy.  You'll know when it is ready when the fish easily releases from the pan.  Don't try to pry it off!*
5. Transfer the salmon to a sheet pan with a cooling rack (to elevate the fish and keep the skin crispy).  Bake for 15-20 minutes, or until the thickest portion of the salmon begins to firm up.  Be very careful not to overcook!!
6. While the fish is cooking, discard the oil from the frying pan, and heat the marinade that was set aside earlier.  Simmer until it reduces by a third to a half.  Take it off the heat and add a few drops of sesame oil, if desired.  
7. Top the fish with a small amount of the reduced marinade and garnish with sesame seeds, cilantro, and scallions. Serve with rice. 


*If you do not care for crispy skin, you can just bake for 20-25 minutes. I would still bake it on the cooling rack, just so the skin doesn't get soggy. 


That's all folks. Night!


xoxo <3
Nhu-Y


Sunday, August 14, 2011

Yellow squash lasagna

A healthy twist


Hello friends!  Hope you've been doing well.  The weather is beautiful here in Ohio!  It was in the 50s this morning when I woke up and will be in the 70s today.  It's a dream.  I love the summer (I am Vietnamese after all) but this heat and humidity is really getting to be too much.  I can't walk from my car to the hospital without breaking a sweat.  I can't wait until autumn is here.  I have lots of fun scarves and boots that I have just been aching to break out!


Now I know that in my last post, I promised that I would cook more, but I haven't gotten to all of the recipes yet :/ But it's not because I've been eating junk, it's because I grossly underestimated how much lasagna my recipe would make!  I have a huge 9x13 pan which isn't even half gone.  I may freeze the rest of it so I can start eating something else :)


I came up with this recipe because I love pasta.. a little too much.  I grew up eating rice with every meal (yes, even with breakfast sometimes) so naturally I love carbohydrates.  Bread, pasta, rice - I'll even eat it plain and be happy.  However, now that I'm getting older I don't think that my body appreciates all that starch.  I even get sleepy after I eat a bowl of pasta nowadays!  I didn't completely eliminate the lasagna noodles because it would be too sad to make lasagna without any pasta (could it still be called lasagna?) so I just substituted half of the noodles with thin slices of quick roasted yellow squash.  I just used my mandoline to cut 1/4"-1/8" slices, but you can easily use a sharp knife as well.


I especially like this recipe because it tastes like a traditional lasagna, even though it is a healthier version.  I use reduced fat cheeses, ground turkey, and the squash in both the sauce and as a substitute for noodles, but it's still mighty good.  I think I've seen healthy lasagna recipes with eggplant "noodles" instead of yellow squash, but I think that the eggplant gets kind of mushy.  The squash maintains its texture and has a very mild flavor - a great substitute for an al dente lasagna noodle.  If you can't find yellow squash, you can use zucchini instead - or if you don't want to be healthy, just use all noodles, full-fat cheese, and beef and have a regular lasagna (I'm not judging)


The recipe takes a little bit of time to make, but you can do some of the steps simultaneously.  Also, the time spent cooking is worth it because you'll be eating for days!  I recommend you halve or even quarter the recipe if you are cooking for just one or two people. Alright, enjoy!


Yellow Squash Lasagna
Serves 8
Print this recipe


Ingredients
6 lasagna noodles
3 medium yellow squash
2 teaspoons olive oil
2 cups reduced fat shredded mozzarella cheese 
15 ounces of low-fat ricotta cheese (one standard container)
1 egg
1/8 cup grated parmesan cheese
2 tablespoons flat leaf parsley, finely chopped
1/2 teaspoon kosher salt
freshly ground black pepper
double recipe of meat sauce


Directions
1. Preheat oven to 375 degrees and boil a large pot of water.
2. Peel the squash.  Small dice one of them, and thinly slice the other two on the long axis (to make long slices, not discs).  Make the slices a little thicker than a lasagna noodle.
3. Take the slices of squash and drizzle them with olive oil.  Roast in oven for approximately 5 minutes.  Don't let the squash cook for too long, or they will become mushy.
4. While waiting for the water to boil, begin making the meat sauce, sautéing the diced squash with the garlic and onions.
5. By this point, the water should be boiling - cook the lasagna noodles according to the directions.
6. While the noodles are cooking, combine the ricotta, parmesan, 1/4 cup mozzarella, egg, parsley, salt, and pepper.  Set aside. 
7.  When the squash, lasagna noodles, and meat sauce are done, build the lasagna.  Start by ladling a small amount of sauce on the bottom of a 9"x13"baking dish so the noodles do not stick.  Lay 3 lasagna noodles on top of the sauce.  Now take a quarter of the ricotta mixture and spread it on top of the noodles.  Ladle a layer of sauce on top of the ricotta layer.  Take a quarter of the remaining shredded mozzarella and sprinkle on the sauce layer.  Place one thin layer of sliced squash on the cheese. Then ricotta, sauce, mozzarella again.  Now repeat these two layers again so you have 4 layers total. End with shredded mozzarella.  You should be left with about half of the meat sauce.
8. Bake for 30 minutes, or until cheese is hot and bubbly.  Slice and top with the remaining sauce.


I hope that these instructions made some sense.  I tried to write it so you can be efficient and do some steps simultaneously. I have realized how difficult it is to write recipes!  I really like to cook my own recipes, but I normally just throw things together and taste as I go.  Cooking is so much more difficult when you have to keep track of quantities!  


Again, somehow this post became super long, so I will let you go for now.  Have a wonderful weekend, everyone!  


xoxo <3
Nhu-Y


Friday, July 29, 2011

Bruschetta


Leftover tomatoes and basil? No problem!


 TGIF. I've been feeling pretty blah for the past couple of days, but it feels nice to relax now. I had to leave work early today because I was feeling so nauseous :/ I think I have a serious case of GERD. I have been having a dry cough for a few months and I just feel queasy. Guess that doesn't mean much unless you're a med school geek like me, but believe me, it's no fun. 


I left work around 2:30 and I was hoping that I would feel a little better after the drive home so I could get some stuff done.  But.. still feeling poopy. I really wanted to go to the mall and get these super cute riding boots that I can wear this fall, and I was going to stop off at the grocery store to buy some food to cook for Mikey tonight.  It's gonna be our last meal together for a while!  He's going to Indianapolis (about 3 hours away) for a urology rotation and he's leaving tomorrow.  I'm really sad because he and I are basically inseparable.  I stay at his place for weeks, sometimes months at a time and now we won't really see each other for 3 months (he's going to Chicago after Indianapolis and then I'm going to Dayton for a rotation).  Boo. Guess it's just a taste of what residency will be like. Gotta prepare myself! 


Anyways, since this is a food blog, let's talk about something yummy!


A few days ago I made a caprese salad so I have a bunch of basil and a few vine-ripened tomatoes leftover.  Not wanting any of it to go to waste, I decided to make one of my favorite appetizers - tomato and basil bruschetta. Bru-SKetta, or bru-SHetta, however you pronounce it, is actually the bread - the word bruschetta is derived from the word "bruscare", which means to roast over coals. We Americans have butchered both the pronunciation and the actual definition of the word! Anyhow, I'm just going to call my recipe tomato and basil bruschetta because I am American I don't really know what else to call it.  


As with the caprese salad, I prefer my tomato and basil bruschetta topping to consist of nice, fresh ingredients.  No canned tomatoes, no dried basil, and no jarred garlic.  Please.  I kind of threw this recipe together with the ingredients that I had on hand, so feel free to modify to your liking.  This recipe is a little heavy on the garlic, just to warn you.  I have also done this recipe with a couple of teaspoons of balsamic vinegar stirred in and it is equally as delicious.  You can also top your bruschetta with a little fresh mozzarella cheese and have a little caprese salad on toast!  Well I hope you enjoy this recipe.  It takes about 10 minutes to make, and most of that time is spent chopping. 


Oh by the way, the Kroger by Mike's apartment had chunks of Parmigiano Reggiano on sale for $3/lb! Not the "parmesan" cheese from Wisconsin or whatever, but the actual stuff from Italy (it was stamped on the rind). No offense to Wisconsin cheese - I loooove cheese and will eat almost any kind of cheese from Wisconsin any day, but I think that real Parmigiano Reggiano just has a unique flavor that cannot be replicated.  I think it was so cheap because they were corner pieces with a lot of rind, but you can just use the rind in a soup or stock.  Or you can give it to your dog! Just kidding, don't give it to your dog - he might choke and I couldn't live with that. I think that my dog would just poop it out whole.  Haha, well enjoy the recipe!


Bruschetta (adapted from foodnetwork.com)
Print this recipe

Ingredients
1 narrow Italian or French loaf of bread
1 head garlic, cut in 1/2 crosswise
2 tablespoons extra-virgin olive oil
Kosher salt and pepper
¼ freshly grated Parmesan cheese

Directions
1. Preheat oven on broiler setting. Place a rack approximately 6 inches from broiler.
2. Slice the loaf of bread, on the bias, into 3/4-inch slices. Place bread in oven on sheet pan and broil, approximately 1 minute on each side.
3. Remove to a platter and rub each slice of bread with the garlic and then brush with olive oil. Sprinkle with freshly grated Parmesan cheese and return to oven for 1 minute, or until cheese is melted. (watch carefully so it doesn't burn!)
4. Sprinkle with salt and pepper and serve immediately.


Tomato and Basil Bruschetta
Print this recipe

Ingredients

3 firm vine-ripened tomatoes, diced (about 2 cups)
1 1/2 tablespoons garlic, minced
2 tablespoons fresh basil, finely chopped
1 - 2 tablespoons olive oil
salt and freshly ground black pepper
Parmesan cheese, grated 

Directions
1. In a medium sized bowl, combine tomatoes, garlic, basil, and olive oil. Add salt and freshly ground black pepper to taste.  Allow to sit for 10 minutes for flavors to marry.  Top with freshly grated Parmesan cheese if desired. 


I don't know if I'll be back to post for a few days. I am helping Mikey move tomorrow and then going back to my apartment to clean, clean, clean!  It is a crazy mess at my apartment because I have only been back to drop off dirty clothes and pick up clean ones this past month. Oh well. Have a great weekend, everyone!


xoxo <3
Nhu-Y 


Wednesday, July 27, 2011

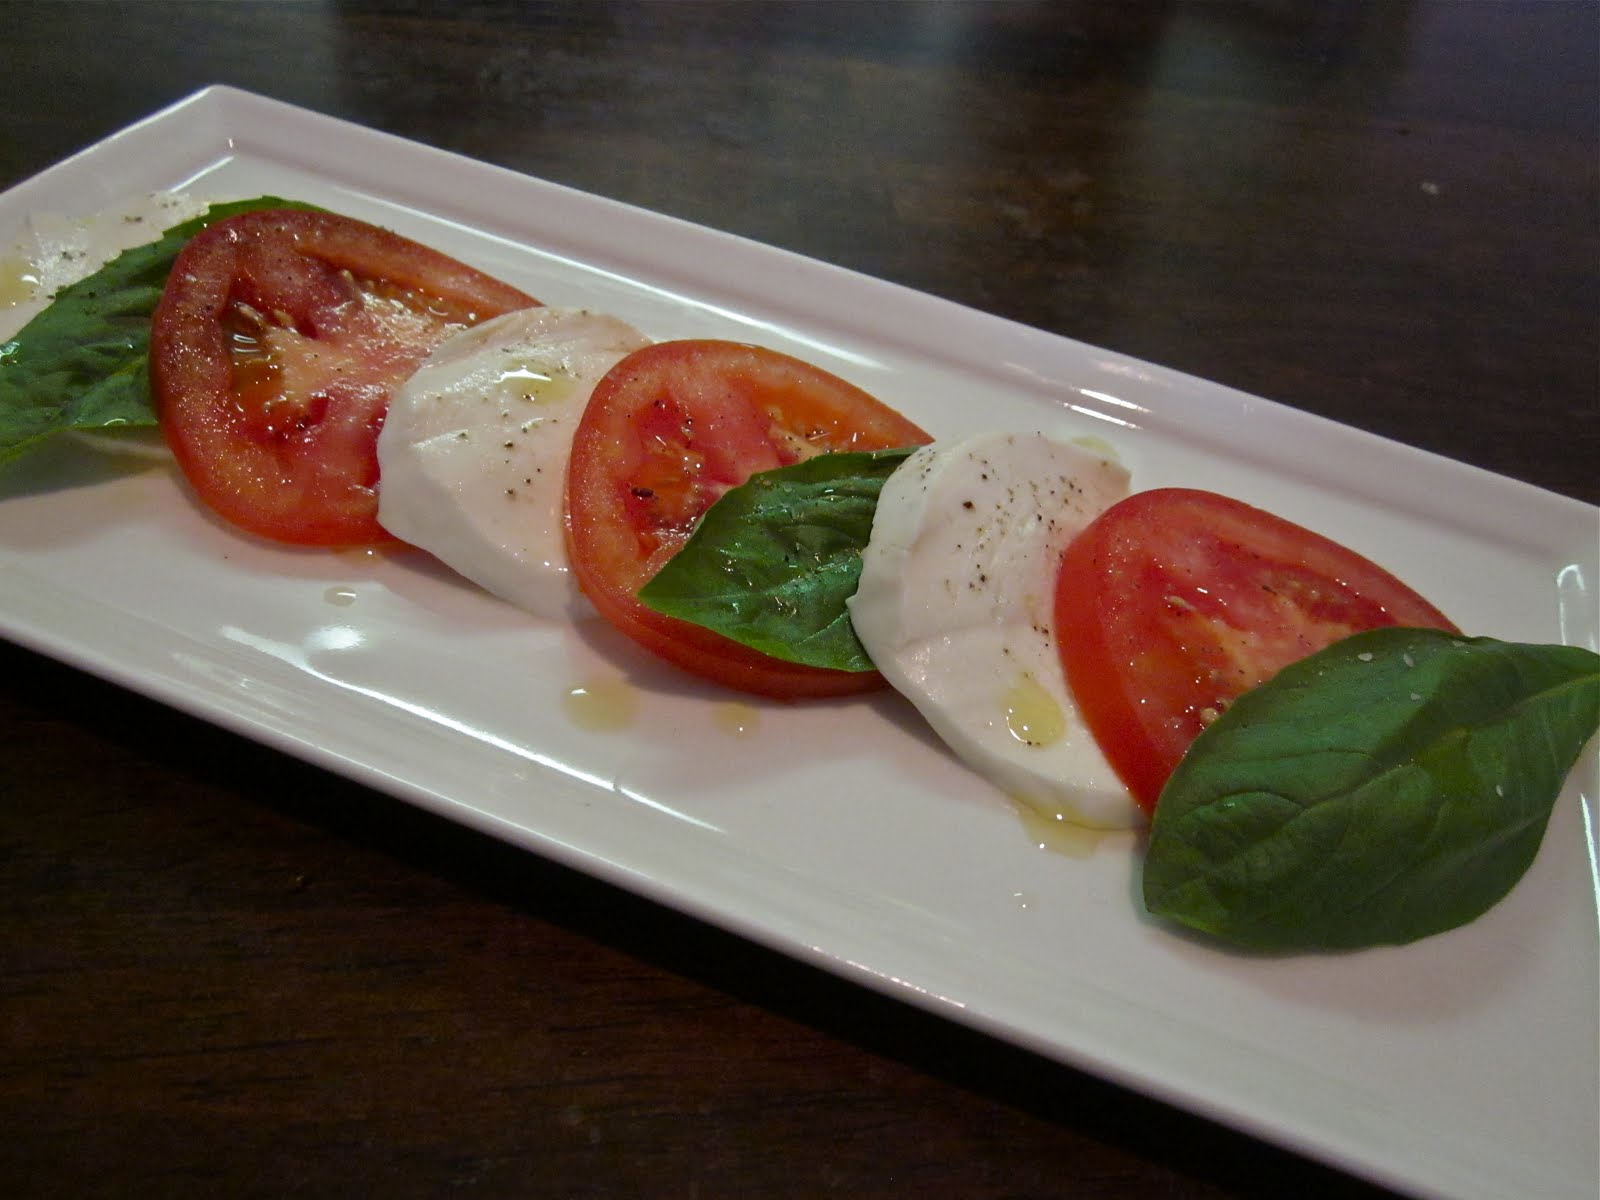
Caprese salad

Simple summer salad


 A lot of the women that I have worked with this month have gardens.  Every day at lunch, they bring cucumbers, tomatoes, bell peppers, and other beautiful and colorful vegetables.  Yesterday, one of the ladies was mentioned her basil and tomatoes, so of course caprese salad came to mind.  I thought that it would be a wonderful and light salad, and it was!

Caprese salad is a simple salad from the Italian region of Campania.  It is classically made of fresh sliced mozzarella cheese, tomatoes, and basil seasoned with salt, pepper and olive oil. I’ve seen variations with balsamic vinegar, with marinated cheese, with roasted tomatoes, and even on a stick! But I think the best way to have it is the classic way – it’s the way that the Italians do it, and they know best. 


Because this is such a simple recipe with few ingredients, it is important to get the best ingredients that you can.  I read a review for this recipe and the lady used jack cheese and canned tomatoes – what a crime! (AND she had the nerve to give the recipe 3 stars!)  A farmers market is perfect for this, but even if you don’t have time to go to the farmers market, just make sure you get fresh heirloom or vine-ripened tomatoes, fresh (NOT dried) basil, and fresh mozzarella.  Most supermarkets now have a great cheese selection and some even have antipasti bars where you can get fresh mozzarella. A nice sweet extra-virgin olive oil is good too, but not absolutely necessary.  I have found that Trader Joe’s has a great inexpensive olive oil from California.  I can’t recall the exact name of the oil, but it comes in a tall, dark, cylindrical bottle. 

I just threw this together and didn’t really use a recipe, but I found a Rachael Ray recipe that is similar to what I did.  One thing that I like to do a little differently is season the tomatoes before I layer the salad.  The salt makes the tomatoes a little more tomato-y, if that makes any sense :). Also, I actually like to tear the basil because it makes it easier to eat. I left them whole in the pictures because it was so pretty. I hope you enjoy!

Caprese Salad (courtesy of Rachael Ray)
Serves 4
Print this recipe


Ingredients
3 vine-ripe tomatoes, 1/4-inch thick slices
1 pound fresh mozzarella, 1/4-inch thick slices
20 to 30 leaves (about 1 bunch) fresh basil
Extra-virgin olive oil, for drizzling
Coarse salt and pepper

Directions
Layer alternating slices of tomatoes and mozzarella, adding a basil leaf between each, on a large, shallow platter. Drizzle the salad with extra-virgin olive oil and season with salt and pepper, to taste.

Bon appetit!


Monday, July 25, 2011

Chicken Adobo

Good enough to be called the Philippines' national dish!


Image from myrecipes.com

I've got a lot of Filipino love :)  Lots of Filipino friends, involvement in the Pilipino Student Association (by proxy - my roommate was the president), one of my favorite mentors is a Filipina physician, and of course, Mikey is Filipino.  Not only do I love Filipinos, I love Filipino food.  First time I had a bite, was love at first taste.  It was home cooking at its finest - not very complex, but so good you have to come back for seconds and thirds. 

A few days ago, Mike and I decided that we needed some comfort food so Mike cooked chicken adobo for me.  Adobo refers to a method of cooking where meat is browned and simmered in a marinade.  There are many different ways to prepare adobo and it is different depending on where you are in the Philippines. Some places add coconut milk, some use pork or seafood, and some use a lot of vinegar. Classically though, adobo is slowly cooked in vinegar, crushed garlic, bay leaf, black peppercorns, and soy sauce then often browned in the oven or pan-fried afterward to get the desirable crisped edges.  Here's Mike's take on chicken adobo: 
Chicken Adobo
Serves 4 
Print this recipe

Ingredients
1 tablespoon vegetable oil
3 lbs chicken thighs and drumsticks
5 cloves garlic, peeled and smashed
1/3 cup white vinegar (or you can use apple cider vinegar)
2/3 cup soy sauce
1 teaspoon whole black peppercorns
2 bay leaves


Directions
1. Heat oil in a medium dutch oven or similar pot over medium-high heat. Add chicken and cook until lightly browned, about 5 minutes, then turn over and cook an additional 5 minutes.
2. Add garlic and cook for approximately 5 more minutes. Stir to avoid burning the garlic.  Spread chicken so it makes one even layer in the bottom of the dutch oven. Add remaining ingredients and stir to incorporate. The sauce should come halfway up the chicken Cook on medium heat, covered, for 20 minutes.  Gently stir every 5-10 minutes to ensure that all of the chicken has some time to cook in the sauce.
3. Uncover, decrease heat to medium-low and cook 15 to 20 minutes more, occasionally spooning sauce over chicken, until sauce thickens a bit and chicken is tender and nicely glazed with sauce. Remove bay leaf before eating.
4. Serve with rice.  My favorite part of the adobo is the sauce.  Spoon it over your rice and you're set :)

Since Mike is is not one to write down recipes or take pictures, the images and the recipe are from myrecipes.com. I modified the recipe a bit.

Hopefully I will learn how to make some other Filipino dishes so I can share them with you!

Bon appetit!